The Appception IDE represents each app as a project. Each project contains all of the folders and files needed to build, run, and release an app.
This document describes the project structure, including the project navigation tree which is used to list and manage projects. It is organized into the following sections:
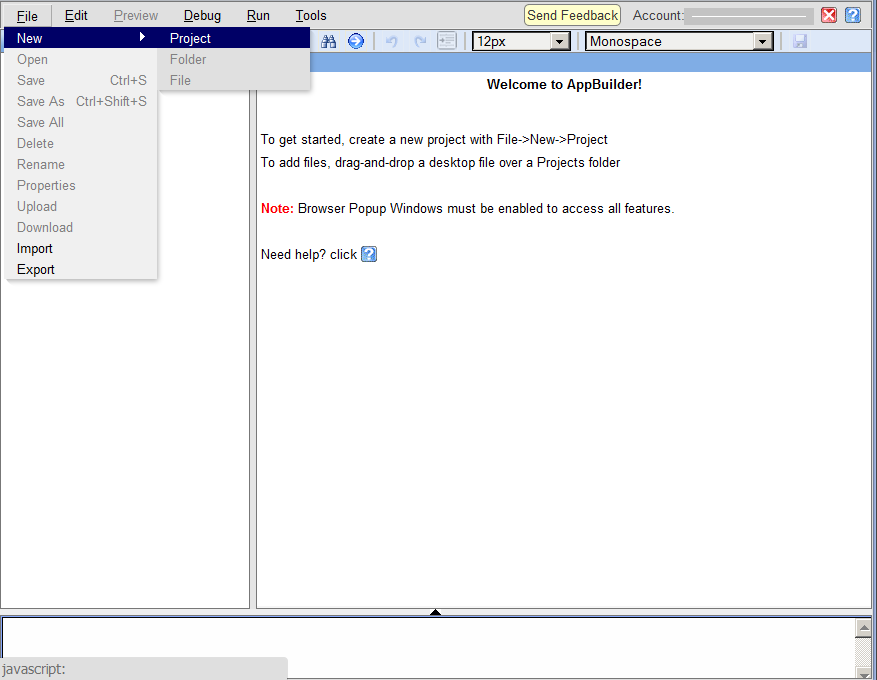
To create a new project, select File->New->Project from the navigation toolbar (horizontal grey bar at the top of the Appception IDE screen).

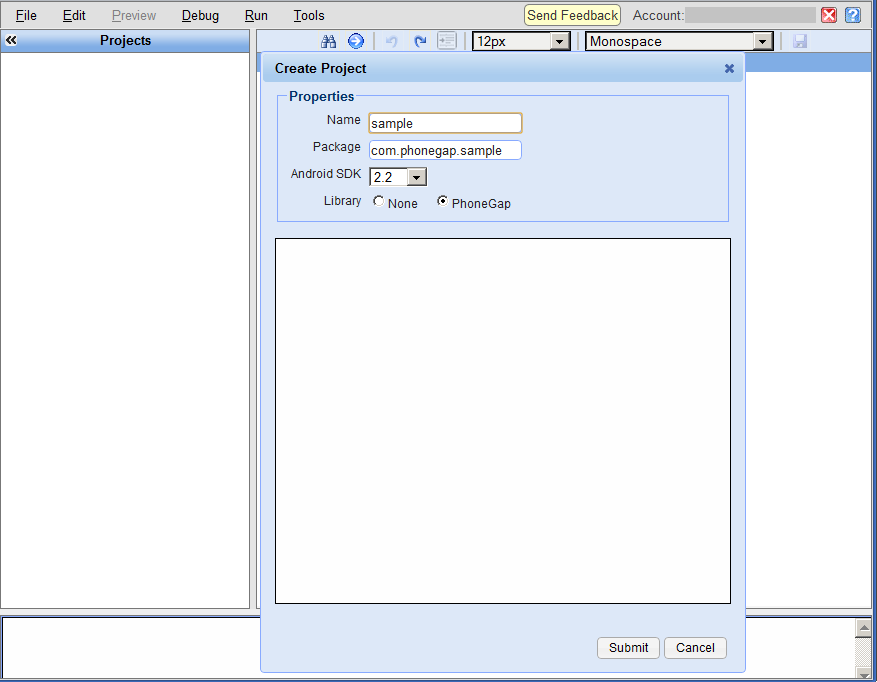
A 'Create Project' dialog box is displayed.
Each project is defined by a set of properties:
This is a short name that will be used to identify the app to users. Typically, it will be displayed together with an app icon on a device.
This is a global identifier that is used to name each app. Since each package must be unique, a convention that is often followed is to set the package to the reverse domain name of the owner, followed by the app name (e.g. com.appception.testapp).
This is the version of Android to which the app is targetted. For the most part, apps targetted at older versions of the SDK will run on devices using newer Android versions; however, the reverse is not true: that is, apps targetted at newer versions may not run on older Android versions. For this reason, it is best to use the oldest Android SDK possible. Note that it may not be possible to use the oldest Android SDK available, since an app may require functions that only exist in a newer SDK. For example, if an app uses functions that are only available on Android tablets, the app may require version 3.0+ instead of 2.2.
This is the name of a programming library (or framework) used by an app. Many apps access sensors or other device functions; PhoneGap (now Cordova) handles many of these functions across platforms. If None is selected, the developer must supply custom code to interface the app to the Android SDK.
To create a simple project for testing purposes, only the project name needs to be entered ('sample' will do).
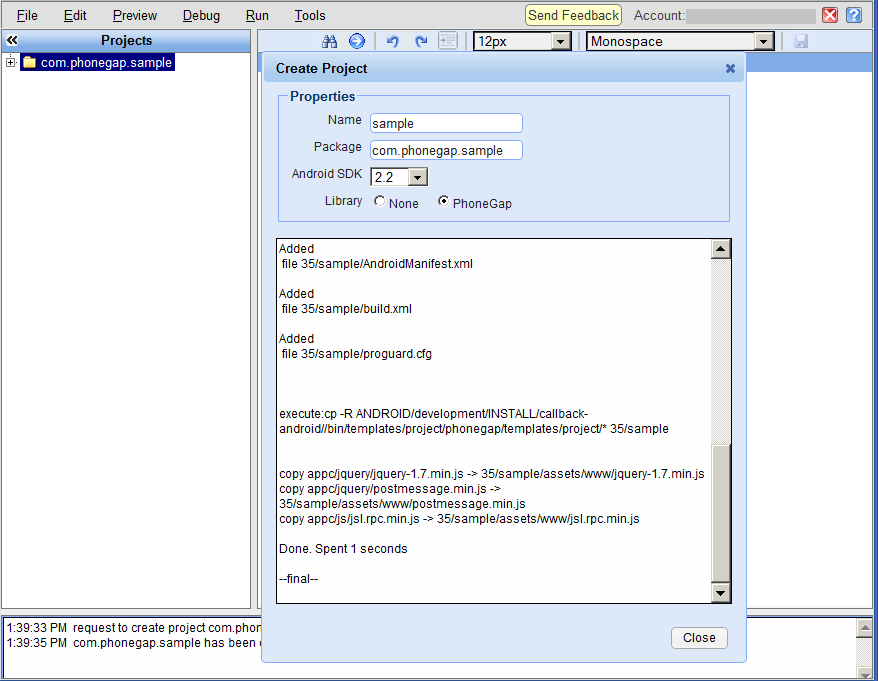
After entering the Name, click the dialog 'Submit' button to create the project. The Appception IDE will then display project creation information as shown below:
The Projects area of the screen contains the Project Navigation Tree. This tree is used to list and manage the folders and files for each project.
Projects and folders within the tree may be opened or closed in two ways:
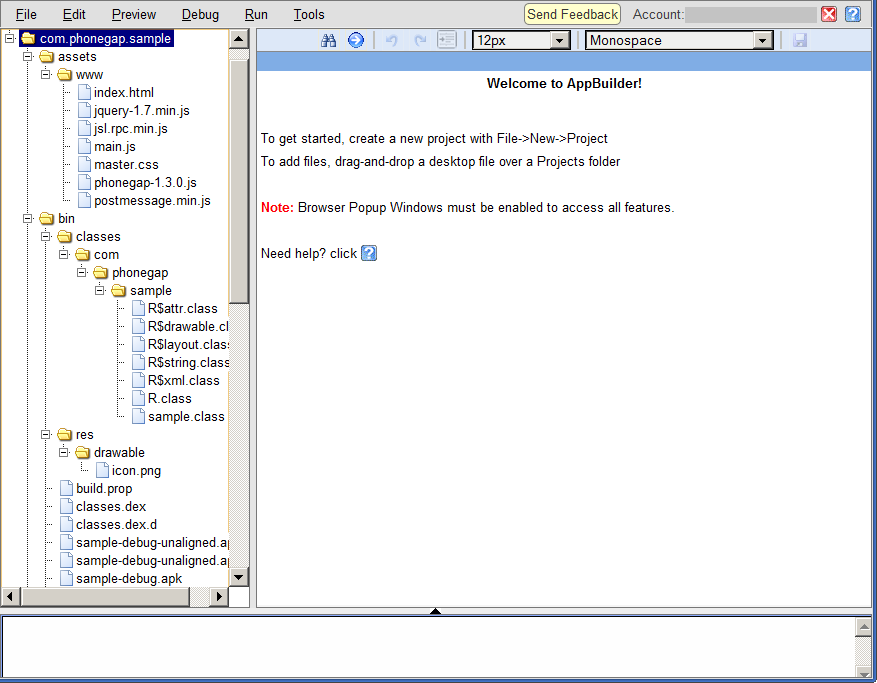
Opening all folders (double-click on project folder icon) would appear as shown below:
The folders and files of a project are managed from the navigation tree with the following operations:
These operations are available using a context menu that is displayed whenever a folder or file is selected by (mouse left-click on folder or file, followed by) mouse right-click as shown below:
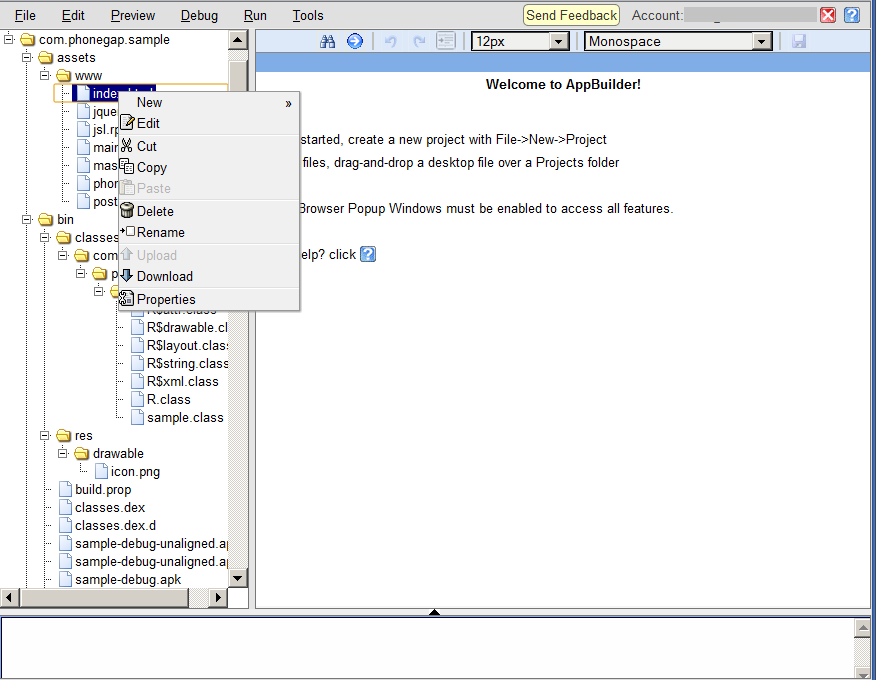
New creates a new folder, or a file within the currently selected folder.
Edit opens the currently selected file in the text editor.
Note: mouse double-click on the file name also opens the file in the text editor.
Cut is used to cut-and-paste a folder or file from one folder to another. If Cut is selected, the folder or file is marked for cut but nothing else happens until another folder is selected, and then Paste is selected. At that time, the folder or file is moved to the new folder.
Copy is used to copy a folder or file from one folder to another. If Copy is selected, the folder or file is marked for copy but nothing else happens until another folder is selected, and then Paste is selected. At that time, the folder or file is copied to the new folder.
Paste is used to move (or copy) a folder or file, from one folder to another as described in the Cut (or Copy) operations.
Delete removes a folder or file.
Important Note: there is no 'undelete' function. Once a file or folder has been removed, it cannot be restored. For this reason, a delete confirmation dialog is always displayed before a folder or file is deleted by the Delete operation.
Rename changes the name of a folder or file.
When Rename is selected, a box appears around the folder or file name. A new name may then be typed, followed by the ENTER key (or a mouse click outside the selected region). If Rename is selected, but no change in name is desired, use ENTER (or a mouse click outside the selected region) immediately.
Upload allows files to be uploaded from the local machine.
Upload displays a dialog which allows the user to Browse to a file on local machine storage, and then Upload it to the selected folder. If the file to be uploaded has a .zip suffix, the Uncompress archive checkbox may be selected to indicate that the file should be uncompressed within the selected folder after it is uploaded; if the checkbox is not selected, then the file is uploaded and left as-is (compressed).
Download allows folders or files to be downloaded to the local machine.
When a folder or file is selected, the browser displays a message box to prompt the user to choose the action to take for the downloaded item (e.g. Open with an application, or Save to a local file). If a folder was selected, it is automatically compressed into a .zip file before the Download operation.
Properties displays certain properties of the selected folder or file.
Folders and files can be moved (or copied) within the browser using drag-and-drop.
If a folder or file is dragged onto another folder, it is moved to that other folder.
If the Ctrl key is pressed prior to the drag operation, the folder or file is copied (instead of moved) to that other folder.
Note: when dragging a folder or file, most browsers will display some type of graphical information to indicate that the item is being moved (or copied). While useful, it is also helpful to remember that a file or folder may only be dropped onto a folder; if a file or folder is dropped onto a file, it will be placed within the folder which contains that file.
Nearly all modern browsers allow single files to be copied from the desktop to a folder in the project navigation tree (which lies within the browser) by dragging the file and dropping it onto a folder.
Many browsers also allow multiple files to be copied in the same way (select each file on the desktop by holding the Ctrl key down).
WebKit browsers allow folders to be copied from the desktop to the project navigation tree. To show copy progress, each file or sub-folder is displayed as it is copied.
To export a project, select the project, then select File->Export from the navigation toolbar.
The browser displays a message box to prompt the user to choose the action to take for the exported project (i.e. downloaded project file). Projects are compressed into .zip files before export.
To import a project, select File->Import from the navigation toolbar.
A dialog box is displayed to prompt the user to Browse to a project archive (i.e. a .zip file) to import. If the project was not previously exported, the Android SDK (Android-platform only) and Library may also be selected. If the project was previously exported, these values are ignored.
To delete a project, select the project and then either select File->Delete fronm the navigation toolbar, or mouse right-click and select Delete.
Important Note: there is no 'undelete' function. Once a project has been removed, it cannot be restored. For this reason, a delete confirmation dialog is always displayed before a project is deleted.