
This guide is meant to get you started with the Appception IDE and run your first app in under 10 minutes.
In order to use the Appception IDE, you will need an account. To obtain an account visit Appception IDE (or follow the 'Login' link on the Appception web site) and click Create new Account. Fill in your details, making sure to choose a strong password and a real e-mail address for activation purposes.

Tha activation e-mail message arrives in a matter of seconds, but if our e-mail is not in your inbox within 15 minutes contact us for support. Do not forget to check your spam/junk box.
After clicking the link in the activation e-mail, proceed with logging in.
Upon login, the main Appception IDE screen is displayed, and organized as follows:
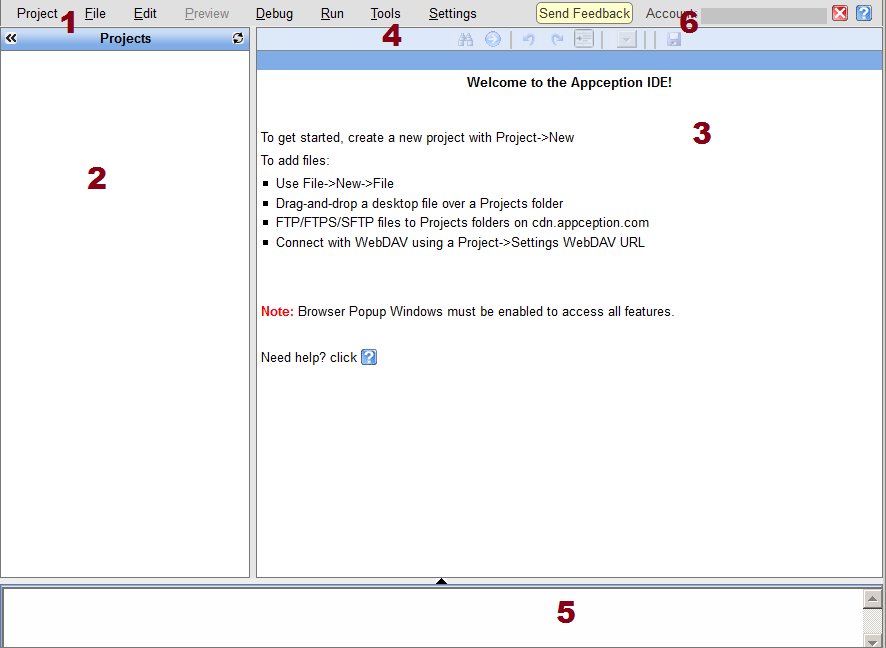
A Project contains all the folders and files for each app.
To create a new Project, select Project->New
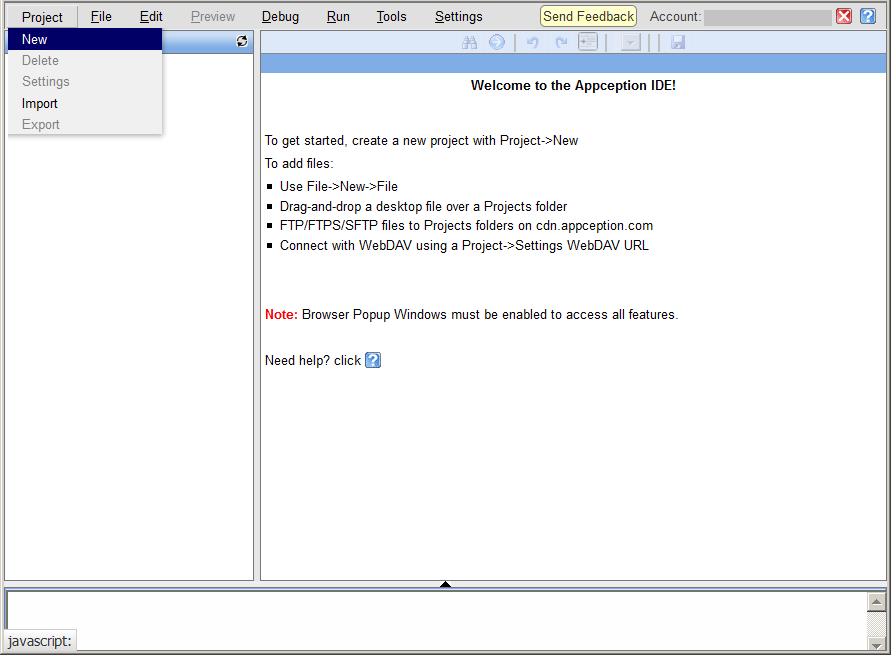
A Create Project dialog box is displayed. Enter a project Name ('sample' will do).
Note: a project Name cannot contain any special characters (except _) and must begin with a letter.
For the 'sample' project, the default values for Package, Android SDK, iOS SDK, and Library can be used.
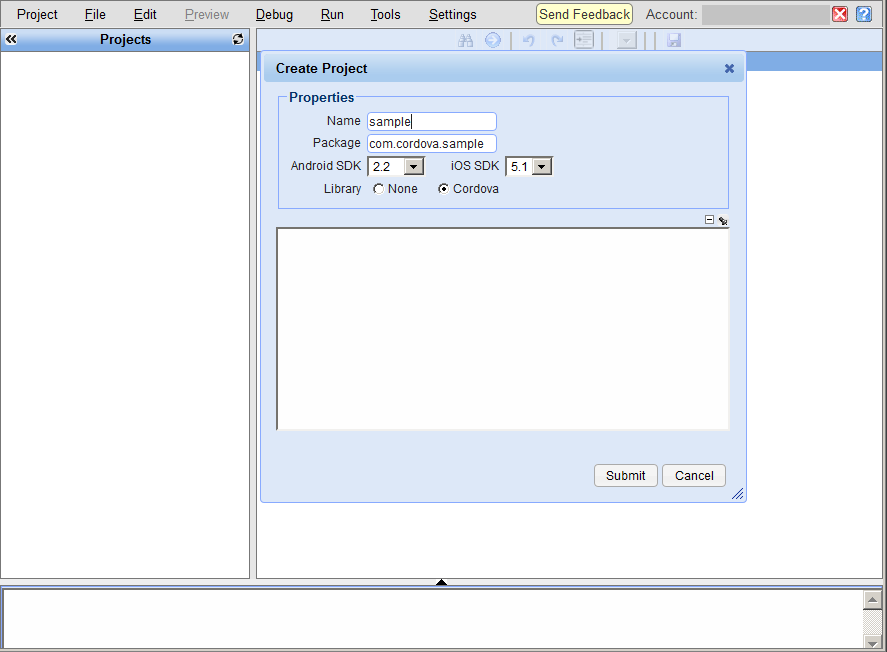
After entering the Name, click the dialog Submit button to create the project. The Appception IDE will then display project creation information.
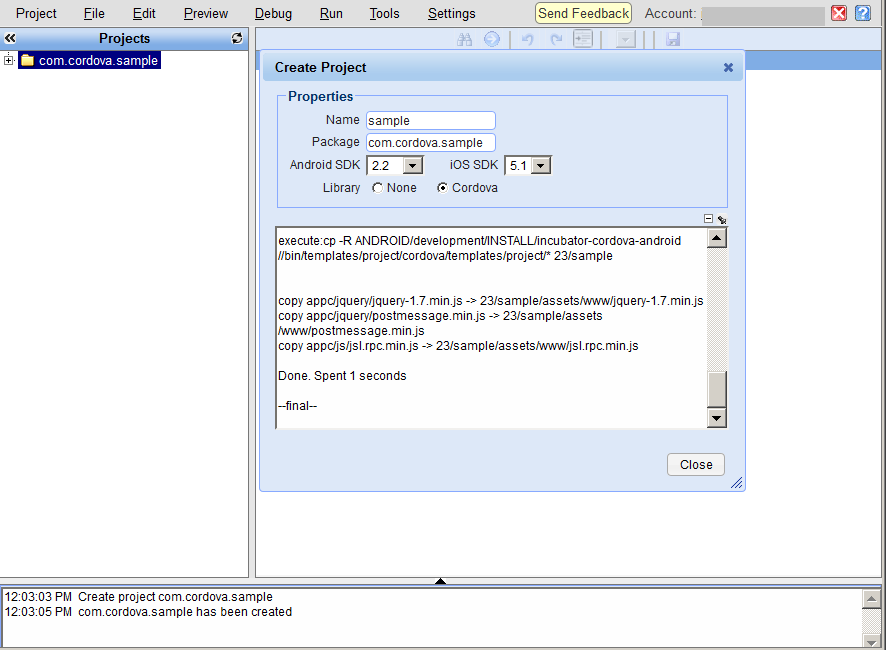
Once the project is created, click the Close button.
You can now navigate the project tree to see all of the project files: double-click on the project Name ('com.cordova.sample' in this case) to open all project folders.
For this sample project, we have used the Cordova (formerly PhoneGap) library in order to access device sensors and other features. All Cordova projects are initially loaded with assets that allow you to run a Demo out of the box.
Double-click on the assets/www/index.html file to open it in the editor: index.html will be executed each time that your app is launched.
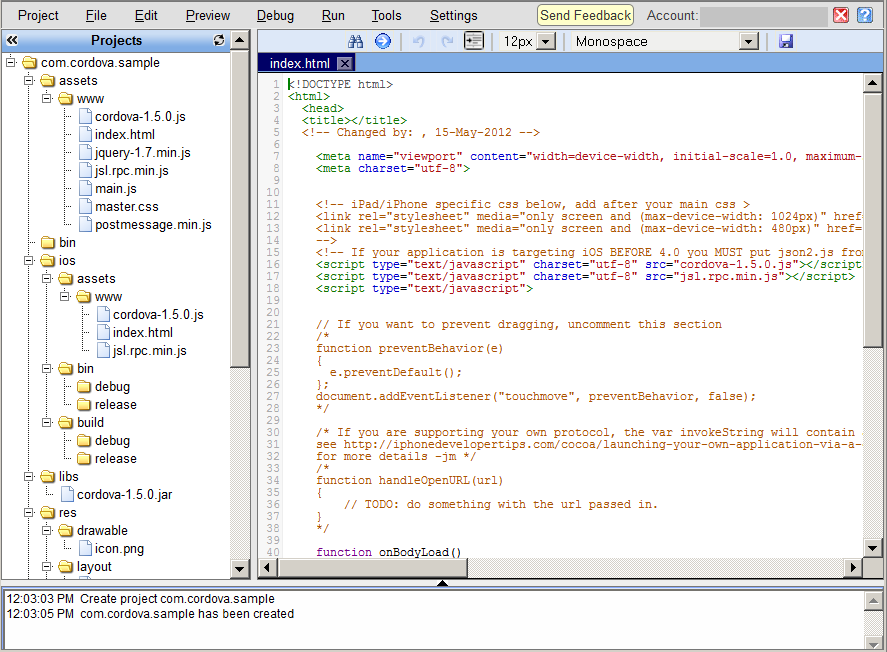
Since your app contains HTML and JavaScript, it can be Previewed in a web browser.
Select Preview->Local to see how this works.
Note: also Preview->Device (Android only)
You can resize the browser window as necessary. Note that functionality is necessarily limited, since the app is not running on a device. However, the browser development tools can be used to test and debug those parts of the app which do not depend on a device.

An extended version of Preview increases the range of operations that can be tested in a web browser.
If your app uses the Cordova library, Preview->Device may be used to redirect Cordova API calls to a device over a wireless connection.
This allows additional testing and debugging to be done in the browser without re-building the app. A special version of Cordova that makes API calls remotely on the device is automatically used. App code that calls the Cordova APIs does not need to be modified.
Note: to use Preview->Device it is necessary to be running the app on Android, and to have the ABug app installed and running.

The Appception IDE also allows you to run your app on a genuine Android Emulator in the cloud.
To do so, select Debug->Emulator->Rebuild All and press Go.
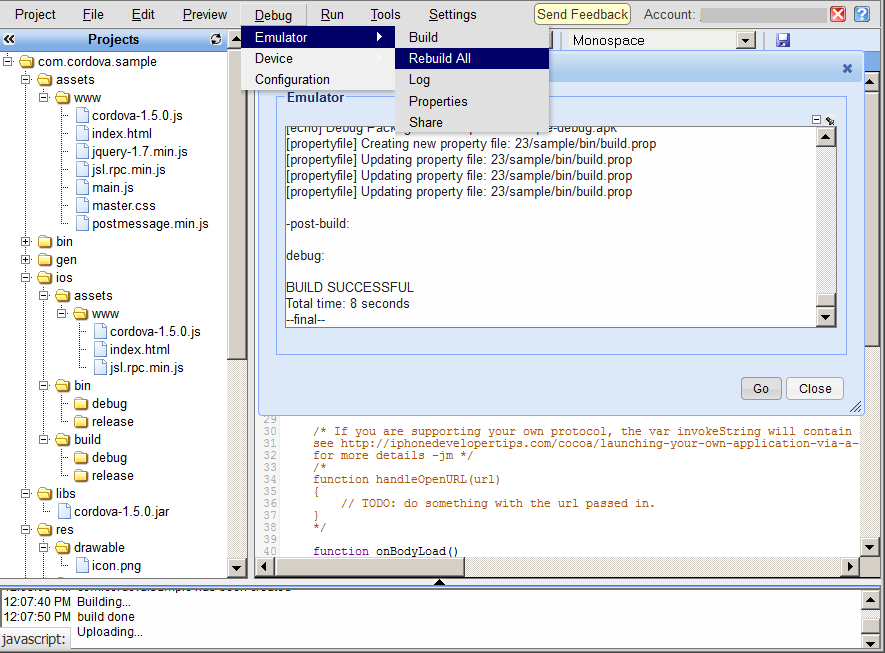
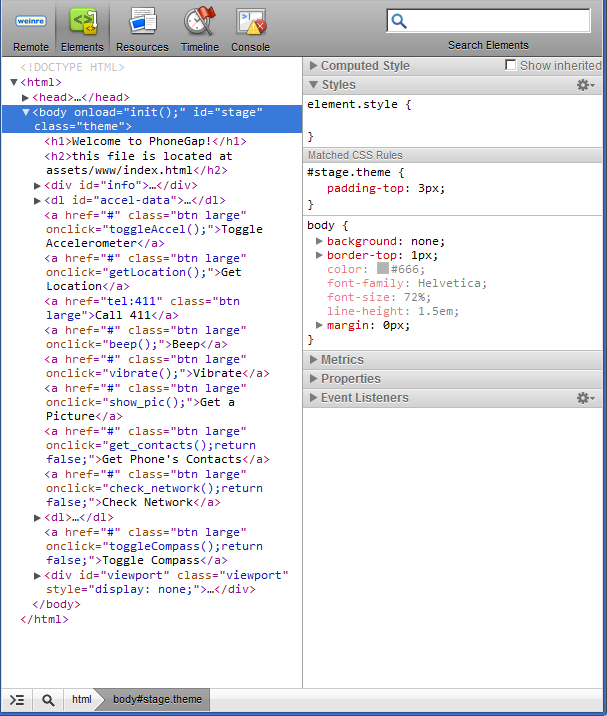
Two windows will pop up: one Window displays the Emulator and the other Window displays the weinre remote inspector.
Note: to see both Windows, you may need to unblock browser popups for this web site.
Congratulations! You are now running your first app in the Appception IDE Emulator.

The weinre remote inspector allows you to view (and modify) the HTML and CSS in the app, and to use a Console.
In order to run your app on an Android Device, select Debug->Device->Rebuild All and press Go.
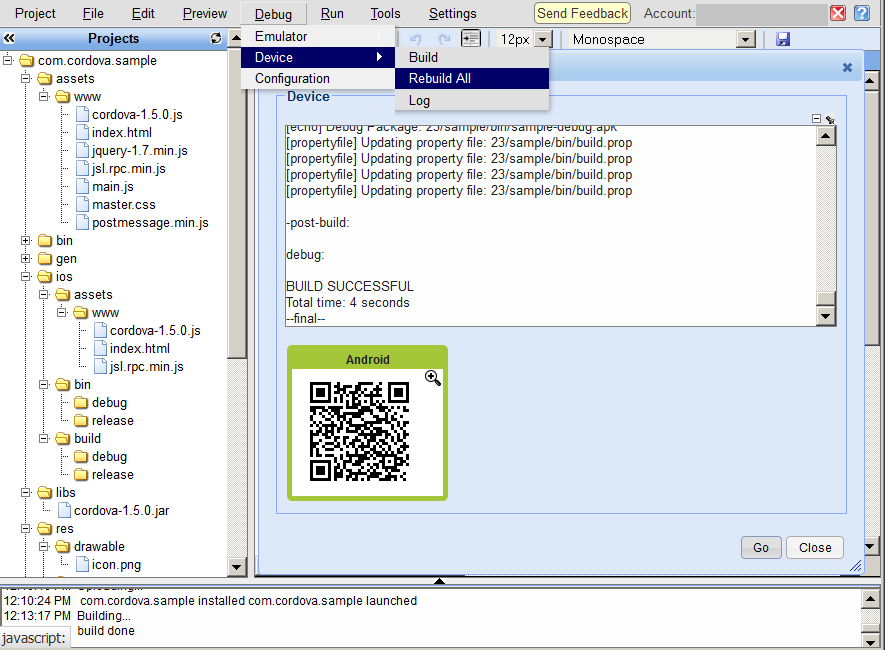
Once the build is complete, your app may be installed.
First, you will need to allow installation of non-Market apps on your Device. To do so, on your Device, access:
Settings->Applications and then mark the 'Unknown sources' checkbox.

Next, install the app either using a QR code app or the direct app URL as described below.
Note:The ABug app may optionally be installed to automate installation of your app.
To use a QR code app to install your app:
To install your app using a URL:
When installing your app, the device will display a screen like this:

To install the app, click Install.
Now, run the app...

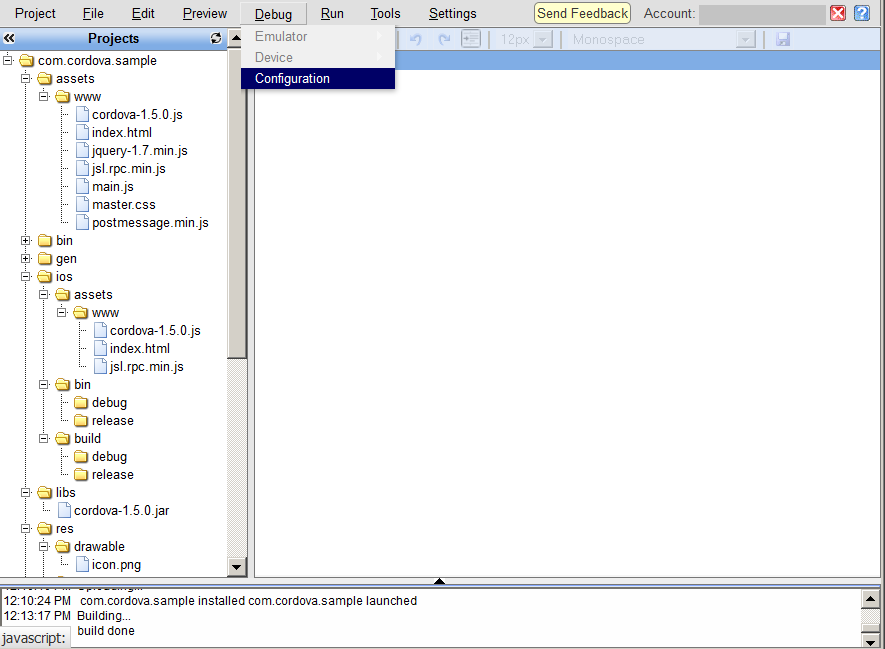
In order to run your app on an iOS Device, select Debug->Configuration
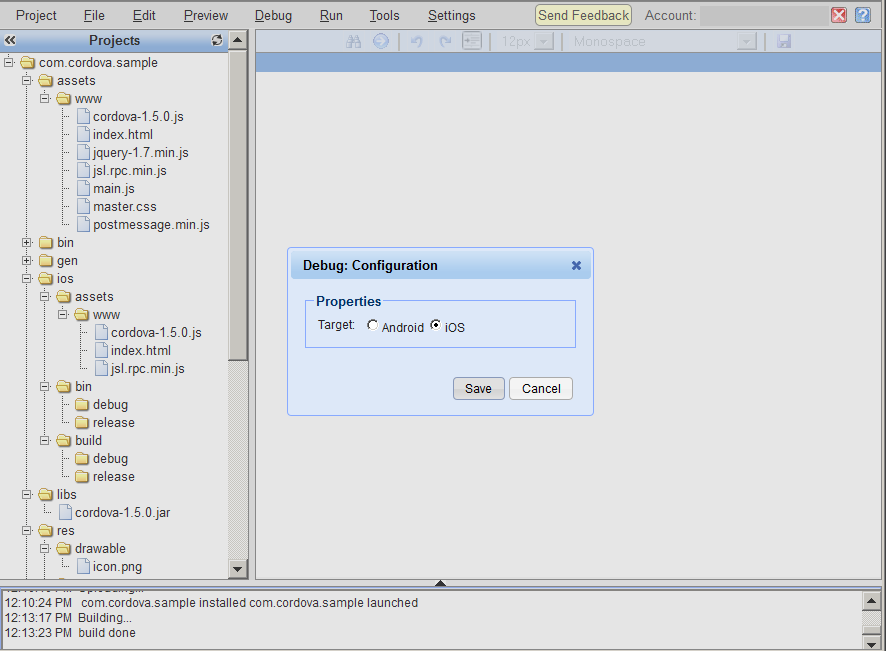
Then, select iOS to set the Debug build configuration to iOS, and press Save
Next, select Debug->Device->Rebuild All
Then, click the icon to the right of the Certificate box, browse to an iOS signing Certificate file (in .p12 format) and upload it.
Next, click the icon to the right of the Provisioning Profile box, browse to a Provisioning Profile file (.mobileprovision) and upload it.
For more information about these files, see the iOS section of the FAQ
Once these files are uploaded, enter the password used to secure the Certificate file and press Go.
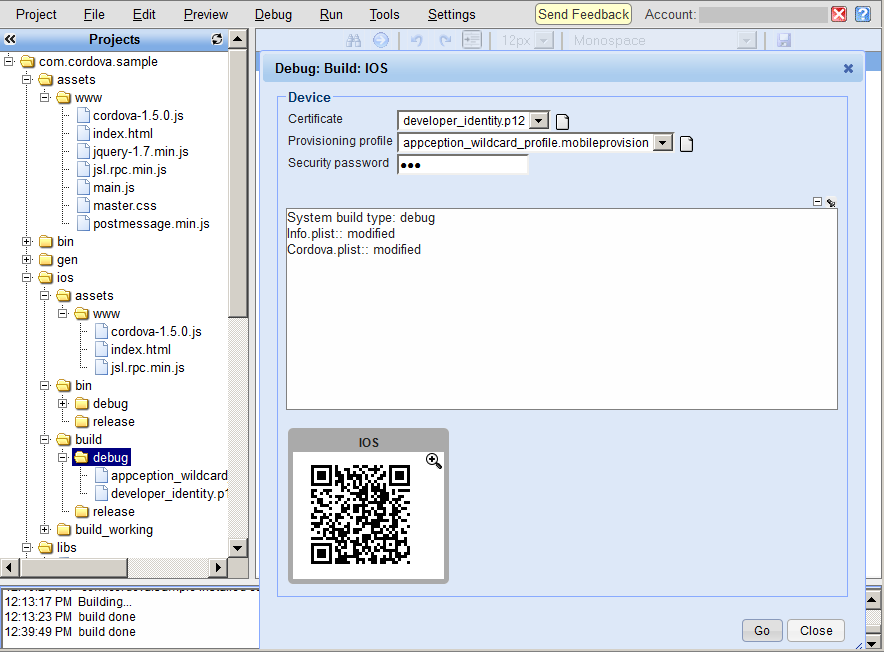
After the build has completed:
Check some of these resources out to kickstart the development of your apps with the Appception IDE: